


Ortho4xpの使い方
MacとWindows用のほとんど使い方は同じです。タイルの枠のイメージが違うくらいです。
Ortho4xpのMacの起動はターミナルをまず起動して以下を入力
$ cd /Users/polo/Desktop/Ortho4XP
$ python3 Ortho4XP_devel.py
Ortho4xpのWindowsの起動は以下のファイルをクリック
Ortho4XP/bin/Ortho4XP_v120b.exe
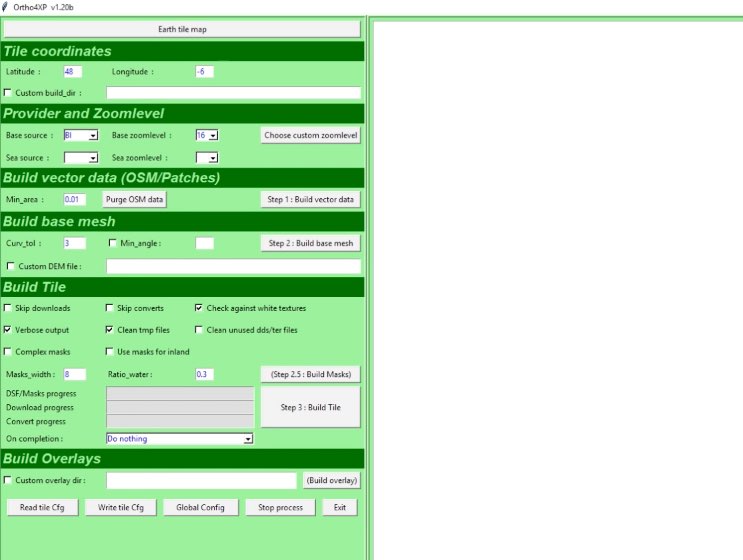
起動したら、一番上の「Earth tile map」をクリック。
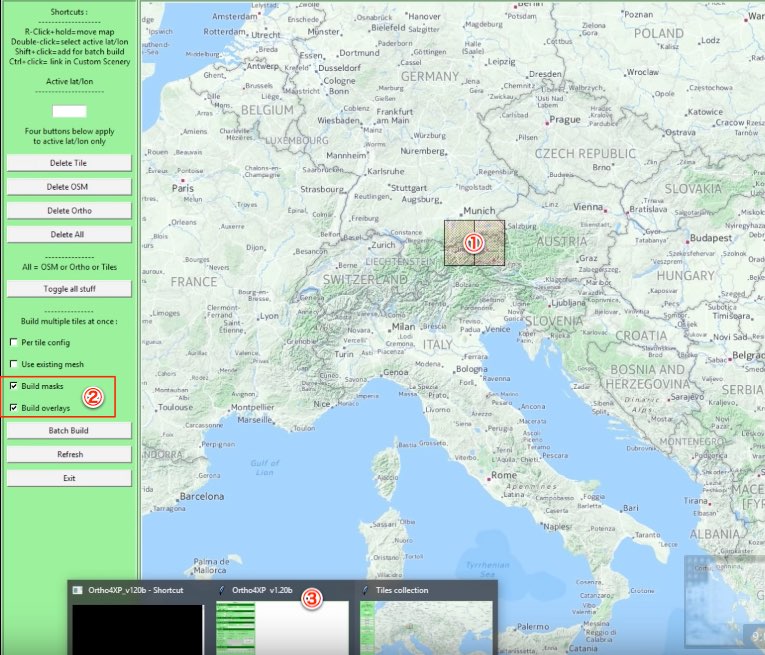
①番でシフトキーを押しながらクリックしてタイルを表示する。赤の地紋が出たら選択状態(Macは赤ベタ)。もちろん1つのタイルだけでも、複数のタイルの選択でもOK。
②でこの2つをチェックする。
③を表示させて最初の画面に切り替える(下にでるOrtho4xpのアイコンから)。
他の設定はデフォルトのまま、あるいはズームレベルを変更する位で良いです。
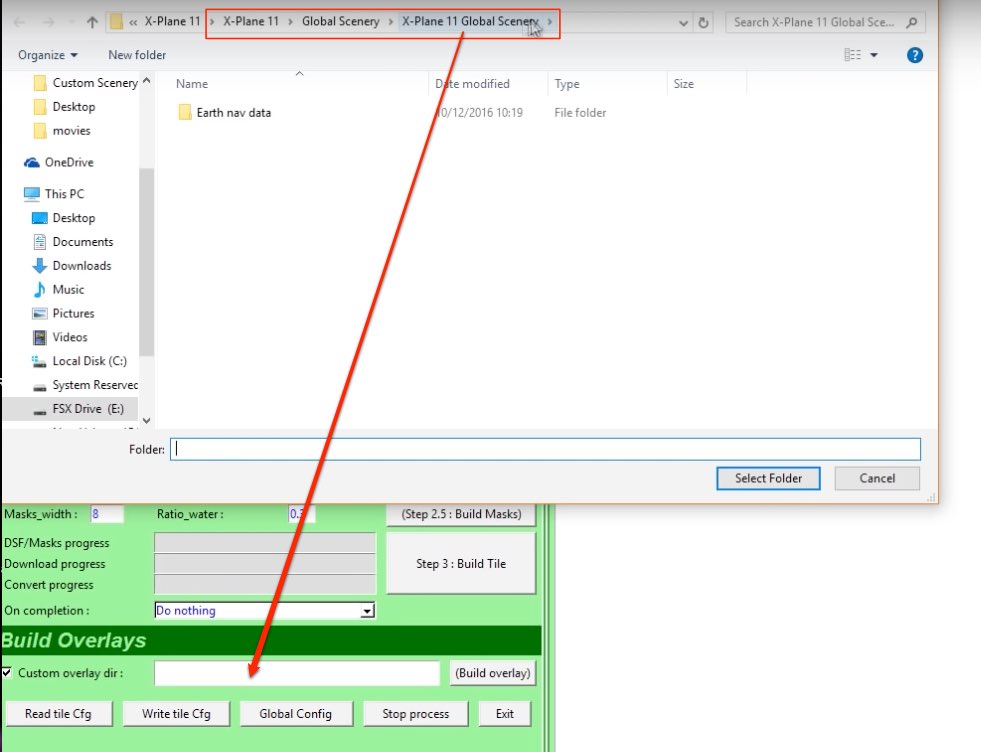
ただコレだけは設定が必要。Build Overlaysのところの左のCustom overlay dirにチェックを入れ、X-Plane 11/Global Sceenery/X-Plane 11 Global Sceenery これを選択して枠の中に入れる。
枠の中はこのようになる「X-Plane 11/Global Sceenery/X-Plane 11 Global Sceenery」
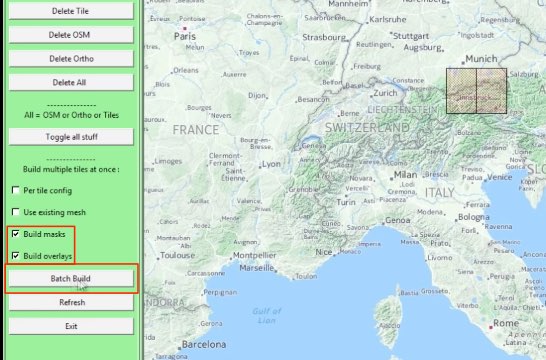
下からもう一度、タイルの画面に移動して、上2つのチェックを確認して下の「Batch Build」をクリック。
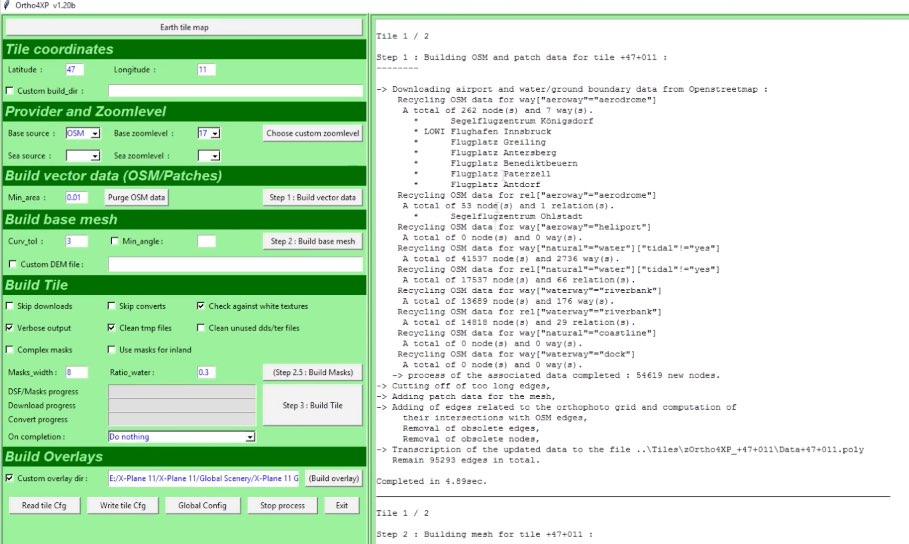
更に最初の画面に移動すると右側にビルドが開始されている。
Ortho4XP内のTilesフォルダ内にビルドの結果が入っている。
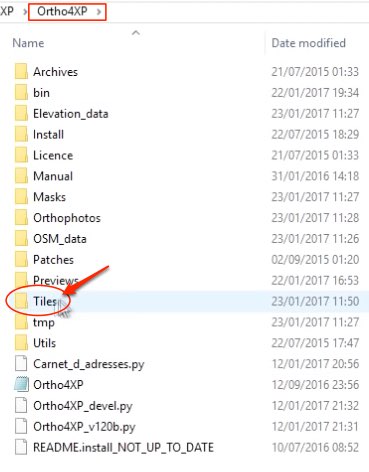
zOrtho4XP_+47+011という作成したタイル名で作成される。
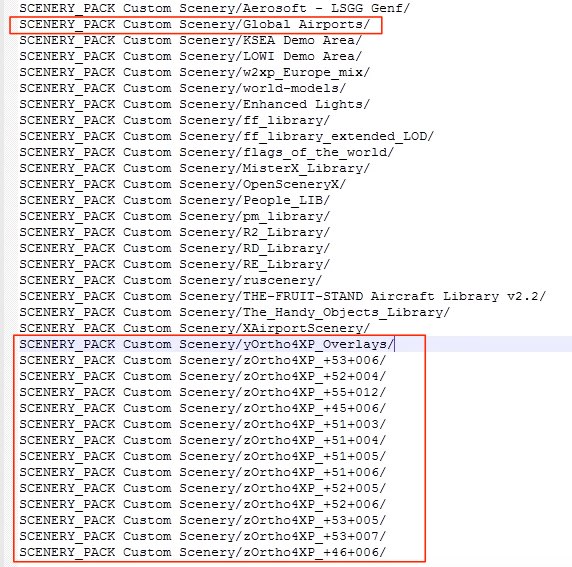
一般的にはこのファイルのショートカット(Windows)又はエイリアス(Mac)を作成してX-PlaneのCustom Sceneryフォルダに入れる。
もう一つ、yOrtho4XP_Overlaysも同じようにショートカット又はエイリアスで入れる。
後は、Custom Sceneryフォルダに入っているscenery_packs.iniファイルを開いてレイヤーを調整すればOK。
yOrtho4XP_Overlaysの下にタイルのファイルを入れる。
Ortho4xpのMacの起動はターミナルをまず起動して以下を入力
$ cd /Users/polo/Desktop/Ortho4XP
$ python3 Ortho4XP_devel.py
Ortho4xpのWindowsの起動は以下のファイルをクリック
Ortho4XP/bin/Ortho4XP_v120b.exe
起動したら、一番上の「Earth tile map」をクリック。
①番でシフトキーを押しながらクリックしてタイルを表示する。赤の地紋が出たら選択状態(Macは赤ベタ)。もちろん1つのタイルだけでも、複数のタイルの選択でもOK。
②でこの2つをチェックする。
③を表示させて最初の画面に切り替える(下にでるOrtho4xpのアイコンから)。
他の設定はデフォルトのまま、あるいはズームレベルを変更する位で良いです。
ただコレだけは設定が必要。Build Overlaysのところの左のCustom overlay dirにチェックを入れ、X-Plane 11/Global Sceenery/X-Plane 11 Global Sceenery これを選択して枠の中に入れる。
枠の中はこのようになる「X-Plane 11/Global Sceenery/X-Plane 11 Global Sceenery」
下からもう一度、タイルの画面に移動して、上2つのチェックを確認して下の「Batch Build」をクリック。
更に最初の画面に移動すると右側にビルドが開始されている。
Ortho4XP内のTilesフォルダ内にビルドの結果が入っている。
zOrtho4XP_+47+011という作成したタイル名で作成される。
一般的にはこのファイルのショートカット(Windows)又はエイリアス(Mac)を作成してX-PlaneのCustom Sceneryフォルダに入れる。
もう一つ、yOrtho4XP_Overlaysも同じようにショートカット又はエイリアスで入れる。
後は、Custom Sceneryフォルダに入っているscenery_packs.iniファイルを開いてレイヤーを調整すればOK。
yOrtho4XP_Overlaysの下にタイルのファイルを入れる。