

参考YouTube:https://www.youtube.com/watch?v=P-zg5anlB_A
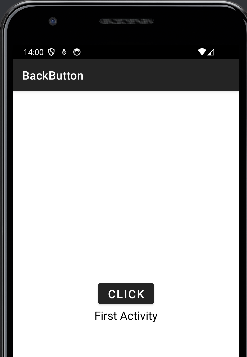
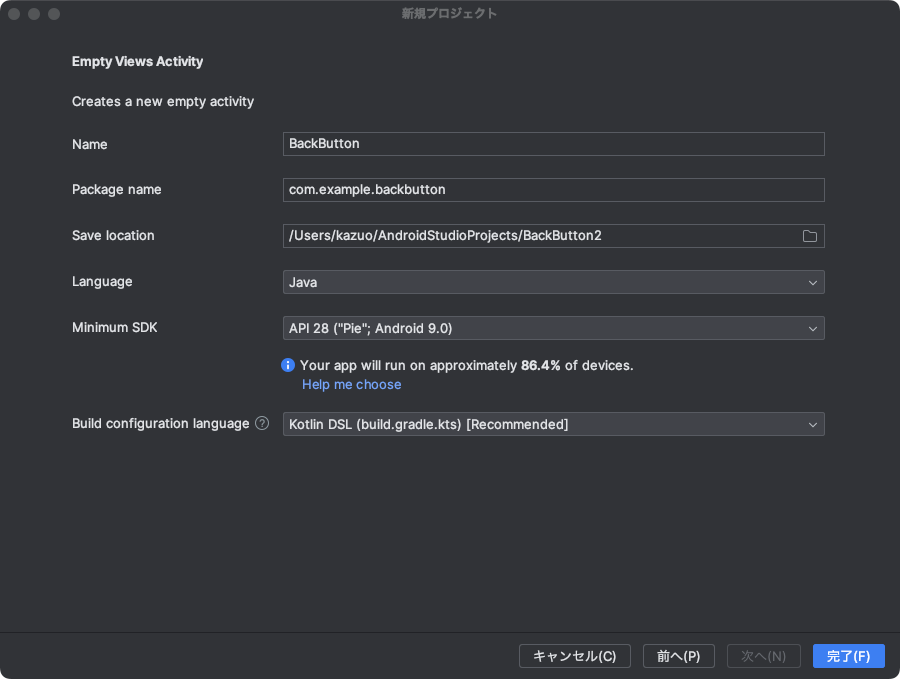
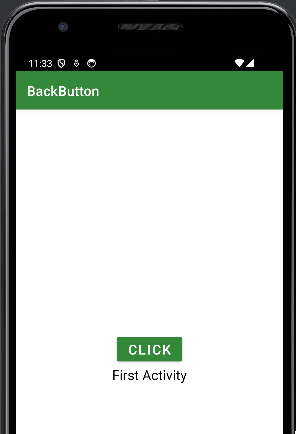
プロジェクト名:BackButton
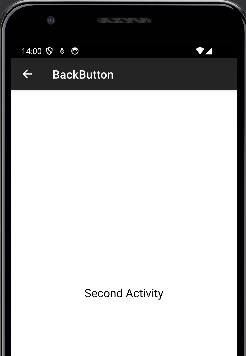
CLICKボタンで次の画面に移動、上の矢印で前画面に戻る。
このプロジェクトには2つのレイアウトが必要。
プロジェクトの作成
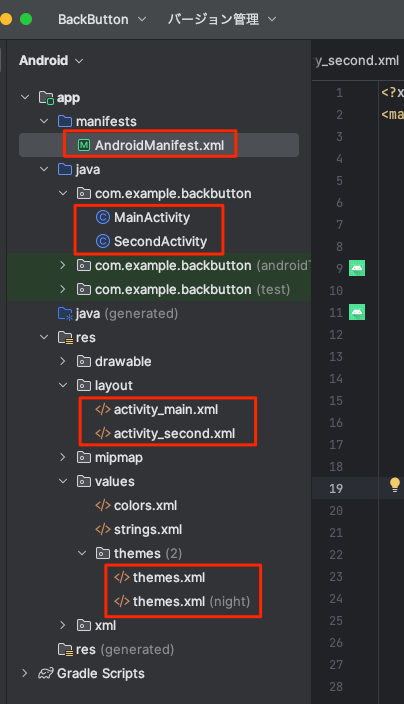
変更したファイルは以下の場所のファイル。
まずレイアウトファイルの作成から
activity_main.xml
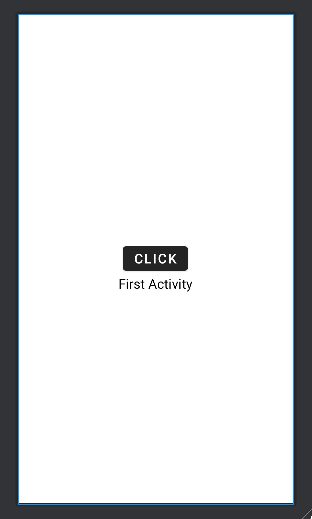
中身のレイアウトは追加変更して上のようになっている。
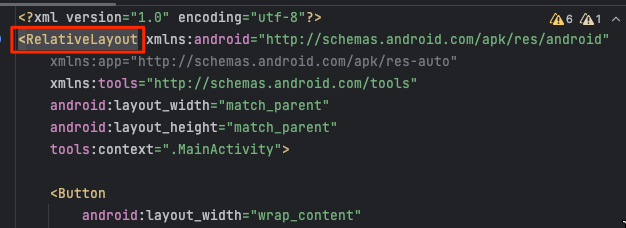
ここで特徴的なのは、長々と記述「<android.support.constraint.ConstraintLayout」されていたところを「<RelativeLayout」に短縮したこと。こんなことができるのだと思った。Relative(相対的)なレイアウトということらしい。
以下の中でButtonのid名「Button」が重要になる。これを使って移動する。
<?xml version="1.0" encoding="utf-8"?>
<RelativeLayout xmlns:android="http://schemas.android.com/apk/res/android"
    xmlns:app="http://schemas.android.com/apk/res-auto"
    xmlns:tools="http://schemas.android.com/tools"
    android:layout_width="match_parent"
    android:layout_height="match_parent"
    tools:context=".MainActivity">

    <Button
        android:layout_width="wrap_content"
        android:layout_height="wrap_content"
        android:id="@+id/Button"
        android:text="Click"
        android:textSize="20dp"
        android:layout_centerInParent="true" />

<!-- 以下ではidは入れなくても動作する、入れていても問題ない他でつかうかもしれないので-->
    <TextView
        android:layout_width="wrap_content"
        android:layout_height="wrap_content"
        android:text="First Activity"
        android:layout_below="@+id/Button"
        android:textSize="20dp"
        android:textColor="#000000"
        android:layout_centerInParent="true" />
</RelativeLayout>
activity_second.xml
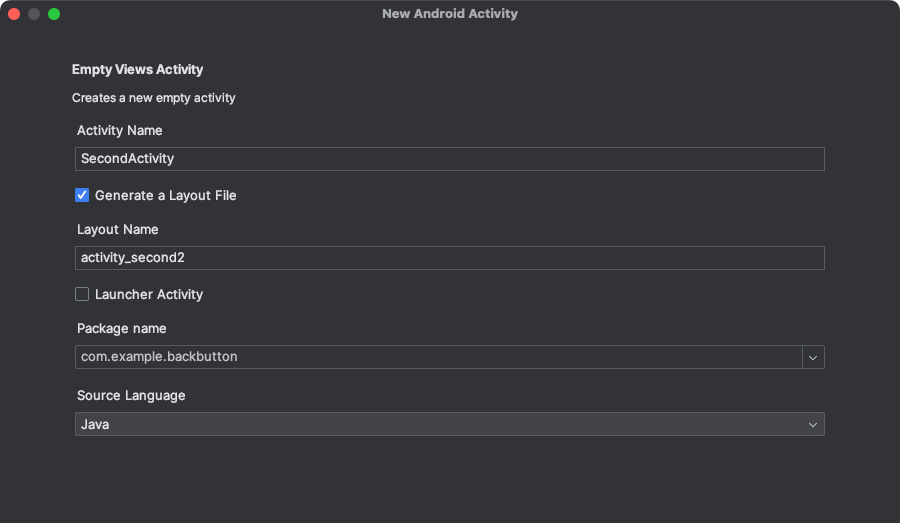
res/新規/Activity/Empty Views Activityから名前を「SecondActivity」とつけてjavaで作成。
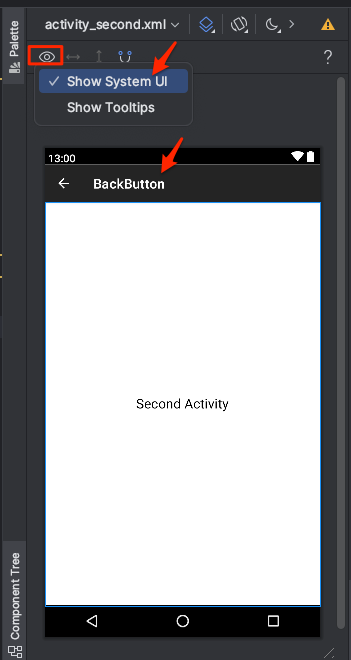
ここの作成が済むと以下のように表示されるようになる。アクションバーは表示されない場合は目のアイコンから「Show Syatem UI」を選択すると下のように表示される。
ここでも「activity_main.xml」でやったように、「<<RelativeLayout xmlns:android=以下そのまま」に変更することを忘れないように。
リンク関係はまったくないのでレウアウトのみ考えれば良い。
最後の android:layout_centerInParent=”true” は親のレイアウトの中央に配置するという意味になる。
<?xml version="1.0" encoding="utf-8"?>
<RelativeLayout xmlns:android="http://schemas.android.com/apk/res/android"
    xmlns:app="http://schemas.android.com/apk/res-auto"
    xmlns:tools="http://schemas.android.com/tools"
    android:layout_width="match_parent"
    android:layout_height="match_parent"
    tools:context=".SecondActivity">
    <TextView
        android:layout_width="wrap_content"
        android:layout_height="wrap_content"
        android:text="Second Activity"
        android:textSize="20dp"
        android:textColor="#000000"
        android:layout_centerInParent="true" />
</RelativeLayout>
AndroidManifest.xml
10行目のandroid:label=”@string/app_name”はアクションバー内に表示されるテキスト名になる。values/strings.xmlにそのテキスト「BackButton」が記述されているので確認できる。
<?xml version="1.0" encoding="utf-8"?>
<manifest xmlns:android="http://schemas.android.com/apk/res/android"
    xmlns:tools="http://schemas.android.com/tools">

    <application
        android:allowBackup="true"
        android:dataExtractionRules="@xml/data_extraction_rules"
        android:fullBackupContent="@xml/backup_rules"
        android:icon="@mipmap/ic_launcher"
        android:label="@string/app_name"
        android:roundIcon="@mipmap/ic_launcher_round"
        android:supportsRtl="true"
        android:theme="@style/Theme.BackButton"
        tools:targetApi="31">
        <activity
            android:name=".SecondActivity"
            android:parentActivityName=".MainActivity"
            android:exported="false" />
        <activity
            android:name=".MainActivity"
            android:exported="true">
            <intent-filter>
                <action android:name="android.intent.action.MAIN" />

                <category android:name="android.intent.category.LAUNCHER" />
            </intent-filter>
        </activity>

        <meta-data android:name="android.support.PARENT_ACTIVITY" android:value=".MainActivity" />
    </application>

</manifest>
strings.xml
res/values/strings.xmlにある。
<resources>
    <string name="app_name">BackButton</string>
</resources>
MainActivity.java
package com.example.backbutton;

import androidx.appcompat.app.AppCompatActivity;

import android.content.Intent;
import android.os.Bundle;
import android.view.View;
import android.widget.Button;

public class MainActivity extends AppCompatActivity {
    Button btn;

    @Override
    protected void onCreate(Bundle savedInstanceState) {
        super.onCreate(savedInstanceState);
        setContentView(R.layout.activity_main);
        btn=findViewById(R.id.Button);
        btn.setOnClickListener(new View.OnClickListener() {
            @Override
            public void onClick(View v) {
                Intent intent=new Intent(MainActivity.this,SecondActivity.class);
                startActivity(intent);
            }
        });
    }
}
SecondActivity.java
SecondActivity.javaは移動しないのでアクションバーについては何も記述しない、デフォルトで開いた状態のままで良い。
package com.example.backbutton;

import androidx.appcompat.app.AppCompatActivity;

import android.os.Bundle;

public class SecondActivity extends AppCompatActivity {

    @Override
    protected void onCreate(Bundle savedInstanceState) {
        super.onCreate(savedInstanceState);
        setContentView(R.layout.activity_second);
    }
}themes.xml(values/themes.xmlとnight/themes.xmlの2つあるがどちらも同じ)
ここはポイントになるところ。
デフォルトの状態。このままではアクションバーは表示されない。
<style name=”Base.Theme.BackButton” parent=”Theme.Material3.DayNight.NoActionBar”>
ここを以下のように書き換えるとバックが黒色のバーとテキストが表示されるようになる。
<style name=”Base.Theme.BackButton” parent=”Theme.MaterialComponents.DayNight.DarkActionBar”>
<resources xmlns:tools="http://schemas.android.com/tools">
    <!-- Base application theme. -->
    <style name="Base.Theme.BackButton" parent="Theme.MaterialComponents.DayNight.DarkActionBar">
        <!-- Customize your light theme here. -->
        <!-- <item name="colorPrimary">@color/my_light_primary</item> -->
    </style>

    <style name="Theme.BackButton" parent="Base.Theme.BackButton" />
</resources>
以上の設定で黒色のアクションバーが表示される。
アクションバーの色を変える
colors.xmlに色を登録
<?xml version="1.0" encoding="utf-8"?>
<!-- カラー一覧:https://ao-system.net/androidcolor/-->
<resources>
    <color name="black">#FF000000</color>
    <color name="white">#FFFFFFFF</color>
    <color name="green_800">#2E7D32</color>
    <color name="light_green_A700">#64DD17</color>
    <color name="light_blue_A100">#80D8FF</color>
    <color name="blue_A700">#2962FF</color>
</resources>themes.xml(両方)に追加記述
item name=”colorPrimary”>@color/green_800 の”colorPrimary“がアプリ全体の基本カラーになる。
他にも設定が色々あるようだ。
<resources xmlns:tools="http://schemas.android.com/tools">
    <!-- Base application theme. -->
    <style name="Base.Theme.BackButton" parent="Theme.MaterialComponents.DayNight.DarkActionBar">
        <!-- Primary brand color. -->
        <item name="colorPrimary">@color/green_800</item>
        <!-- Secondary brand color. -->
        <!-- Status bar color. -->
        <!-- Customize your theme here. -->
    </style>

    <style name="Theme.BackButton" parent="Base.Theme.BackButton" />
</resources>