

単純な前処理、単純な後処理が必要な反復処理においては for 文
例えば: 繰り返す回数が分かっている処理など
複雑な前処理や後処理が必要な反復処理が必要な場合は while 文を使う
Luaの基本:制御構文(if、for、while、repeat)等がある、repeatがFlyWithLuaで使えるか不明。
目次
簡単な基本形
同じパターンを作成するのに便利な関数。基本形で1からカウントを始め3まで出力。
X-Plane画面に直接描画する。
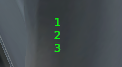
draw_stringには2つの「i」がある、どちらも1〜3の数値が入る。前のiは縦の送りを、後のiは数値を表示するための「i」になっている。
function Text_draw()
	for i = 1 , 3 do
      draw_string(100, 400 - 13*i, i, 0, 1, 0)
	end
end

do_every_draw("Text_draw()")
他のパターン
for i = 1 , 3 do
draw_string(100, 400 – 13*i, i, 0, 1, 0) — 1 2 3が出力される
end
for i = 3 , 1 ,-1 do
draw_string(100, 400 – 13*i, i, 0, 1, 0) — 順番が反転して3 2 1が出力される
end
for i = 1 , 5 , 2 do
draw_string(100, 400 – 13*i, i, 0, 1, 0) — 間が抜けて1 3 5が出力される
end
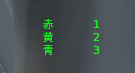
arr = {“赤”,”黄”,”青”}
for i = 1 , #arr do
draw_string(100, 400 – 13 * i, arr[i], 0, 1, 0)– 赤 黄 青が出力される
draw_string(150, 400 – 13 * i, i, 0, 1, 0) — 1 2 3が出力される
end
上の最後の結果がこれ:
特定の行だけを表示しないcontinue関数
function Text_draw()
    for i = 1, 5, 1 do
        if i == 3 then
            goto continue
        end
        draw_string(100, 400 - 13 * i, i, 0, 1, 0)
        ::continue::
    end
end

do_every_draw("Text_draw()")
上のやり方でこのようにテキストだけでな描画した四角なども、同じようにできる。
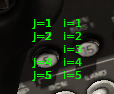
continueを入れ子にしてみる。やっていることは基本と変わらない。continueが入るところだけが機能する。それ以外は普通の状態である。
function Text_draw()
for i = 1, 5 do
for j = 1, 5 do
if j == 3 then
goto continue
end
draw_string(100, 400 - (13 * j), "j=" .. j, 0, 1, 0)-- j=2が出力される
::continue::
end
draw_string(130, 400 - (13 * i), "i=" .. i, 0, 1, 0)-- i=1 i=2が出力される
end
end
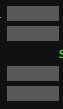
do_every_draw("Text_draw()")brakeを使用してループ処理から抜ける
for文でbreakを使用するとループ処理から抜けます。ここでは3になったらbrakeなので2までが表示される。

function Text_draw()
for i = 1, 5 do
if i == 3 then
break
end
draw_string(100, 400 - (i * 13), i, 0, 1, 0) -- 1が出力される
end
end
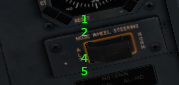
do_every_draw("Text_draw()")入れ子の状態でbrakeを使用しても同じ状態になる。

左側が入れ子の表示brakeが効いていいる、右側が外のfor分でここはbrakeが影響していない。入れ子にする意味が無い。
function Text_draw()
    for i = 1, 3 do
        for j = 1, 5 do
            if j == 5 then
                break
            end
            draw_string(80, 400 - (j * 13), j, 0, 1, 0) --  1~2が出力される
        end
        draw_string(100, 400 - (i * 13), i, 0, 1, 0)     -- 1~5が出力される
    end
end
do_every_draw("Text_draw()")
imaguiを使ってテキストと組み合わせて出力
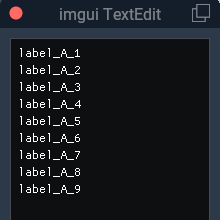
for i = 1, 9 do
imgui.TextUnformatted(“label_A_” .. i)
end
ABC = {1,2,3,4,5,6,7,8,9}
for i = 1, #ABC do
imgui.TextUnformatted(“label_A_” .. ABC[i])
end
上の2つ同じ出力結果になる:
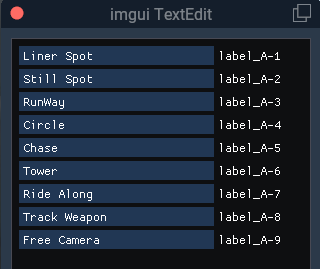
InputTextをfor文で繰り返し処理をしてみる
この場合、Laver_Aのテーブルをまず作成することが必要になる。
「”label_A-” .. i」となっているところは文字列の後に「 i 」を入れて繋ぐと文字列の後に1〜9が入る。
「label_A[I]」はテーブルから順番に読み込んでいる。
これでインプットテキストの9つの繰り返しパターンが作成される。
demo_wnd = float_wnd_create(300, 250, 1, true)
float_wnd_set_title(demo_wnd, "imgui TextEdit")
float_wnd_set_imgui_builder(demo_wnd, "build_demo")

label_A = { "Liner Spot", "Still Spot", "RunWay", "Circle", "Chase", "Tower", "Ride Along", "Track Weapon", "Free Camera" }
function build_demo(wnd, x, y)
    for i = 1, #label_A do
        local changed, newLabel = imgui.InputText("label_A-" .. i, label_A[i], 255) -- パラメーター:ラベル、現在のテキスト、許可される最大文字数
        if changed then
            label_A[i] = newLabel
        end
    end
end
以下は「for do」を使う前の全てのデータを一つ一つ綺麗に並べたもの。これが上のように単純になる。
結果は上と同じになる。
label_A_1 = "Liner Spot"
label_A_2 = "Still Spot"
label_A_3 = "RunWay"
label_A_4 = "Circle"
label_A_5 = "Chase"
label_A_6 = "Tower"
label_A_7 = "Ride Along"
label_A_8 = "Track Weapon"
label_A_9 = "Free Camera"
local changed, newLabel_A_1 = imgui.InputText("label_A-1", label_A_1, 255) -- パラメーター:ラベル、現在のテキスト、許可される最大文字数
if changed then
label_A_1 = newLabel_A_1
end
local changed, newLabel_A_2 = imgui.InputText("label_A-2", label_A_2, 255) -- パラメーター:ラベル、現在のテキスト、許可される最大文字数
if changed then
label_A_2 = newLabel_A_2
end
local changed, newLabel_A_3 = imgui.InputText("label_A-3", label_A_3, 255) -- パラメーター:ラベル、現在のテキスト、許可される最大文字数
if changed then
label_A_3 = newLabel_A_3
end
local changed, newLabel_A_4 = imgui.InputText("label_A-4", label_A_4, 255) -- パラメーター:ラベル、現在のテキスト、許可される最大文字数
if changed then
label_A_4 = newLabel_A_4
end
local changed, newLabel_A_5 = imgui.InputText("label_A-5", label_A_5, 255) -- パラメーター:ラベル、現在のテキスト、許可される最大文字数
if changed then
label_A_5 = newLabel_A_5
end
local changed, newLabel_A_6 = imgui.InputText("label_A-6", label_A_6, 255) -- パラメーター:ラベル、現在のテキスト、許可される最大文字数
if changed then
label_A_6 = newLabel_A_6
end
local changed, newLabel_A_7 = imgui.InputText("label_A-7", label_A_7, 255) -- パラメーター:ラベル、現在のテキスト、許可される最大文字数
if changed then
label_A_7 = newLabel_A_7
end
local changed, newLabel_A_8 = imgui.InputText("label_A-8", label_A_8, 255) -- パラメーター:ラベル、現在のテキスト、許可される最大文字数
if changed then
label_A_8 = newLabel_A_8
end
local changed, newLabel_A_9 = imgui.InputText("label_A-9", label_A_9, 255) -- パラメーター:ラベル、現在のテキスト、許可される最大文字数
if changed then
label_A_9 = newLabel_A_9
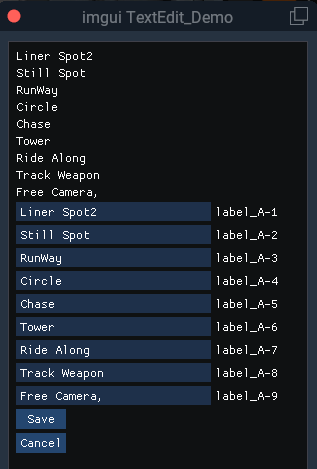
end読み書きを追加して変更を保持する
読み書きを設定しないと、変更したデータは再起動したら元に戻ってしまう。SaveボタンとCancelも付けて作成してみた。これで保存すると変更したデータはそのまま保持することができる。
demo_wnd = float_wnd_create(300, 450, 1, true)
float_wnd_set_title(demo_wnd, "imgui TextEdit_Demo")
float_wnd_set_imgui_builder(demo_wnd, "build_demo")

label_A = { "Liner Spot", "Still Spot", "RunWay", "Circle", "Chase", "Tower", "Ride Along", "Track Weapon", "Free Camera"}
--ファイル読み込みための関数、Cancelボタンにも使用するため作成、この下に改めて読み込みのためにも使用。
local function file_read()
	file = io.open(SCRIPT_DIRECTORY .. "KF-test.txt", "r")
	for line in file:lines() --ファイルを全て読み込む
		label_A[1], label_A[2], label_A[3], label_A[4], label_A[5], label_A[6], label_A[7], label_A[8], label_A[9] = string.match(line,
				"(.-)%,(.-)%,(.-)%,(.-)%,(.-)%,(.-)%,(.-)%,(.-)%,(.+)")
	end
	file:close() -- 最後にf:closeでファイルを閉じる
end
file_read()

function build_demo(wnd, x, y)
    for i = 1, #label_A do
        imgui.TextUnformatted(label_A[i])
    end

    for i = 1, #label_A do
        local changed, newLabel = imgui.InputText("label_A-" .. i, label_A[i], 255) -- パラメーター:ラベル、現在のテキスト、許可される最大文字数
        if changed then
            label_A[i] = newLabel
        end
    end

    -- Saveボタンでファイルに書き出す----------------------
	if imgui.Button("Save", 50, 20) then
		local file = io.open(SCRIPT_DIRECTORY .. "KF-test.txt", "w")
        for i = 1, #label_A do
            file:write(label_A[i] .. ",")
        end

		file:close()
	end

    if imgui.Button("Cancel", 50, 20) then
		--file_read()
	end

end