X-Plane コクピットの自作に挑戦!
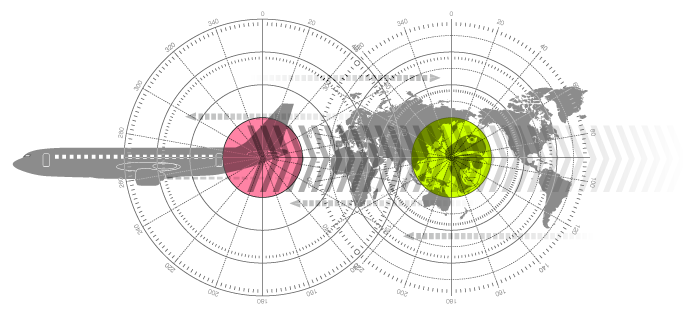
X-Plane 針路バグのコントロール
ロータリーエンコーダを使用して、針路バグを制御。
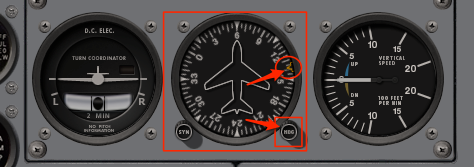
右下のノブを回すとオレンジのマーカーが動作する、数字が変化する。これをロータリーエンコーダで回します。
今回の実際のレイアウトと配線図です。

ロータリーエンコーダをTeensyに繋いだだけのシンプルな配線です。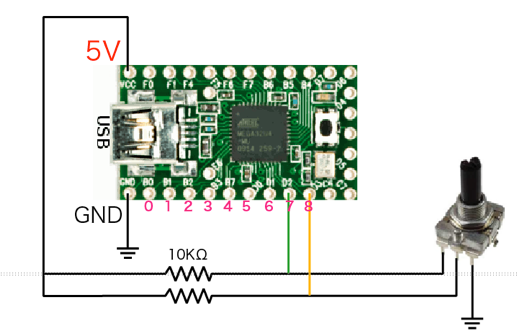
ピンはこれ以外でももちろん動作します。色々試して見てください。
針路バグのスケッチ
X-Plane heading-bug.ino
#include <Encoder.h>

Encoder myEnc(7, 8);
short myEncPrev = 0;

FlightSimFloat headingBug;

void setup() {
  headingBug = XPlaneRef("sim/cockpit2/autopilot/heading_dial_deg_mag_pilot");
}

void loop() {
  FlightSim.update();

  // divide by 4 to find how many 'clicks' the encoder's gone through
  short myEncDiff = (myEnc.read() - myEncPrev) / 4;

  if (myEncDiff) {
    // only update prev when we've reached a detent!
    myEncPrev = 0;
    myEnc.write(0);

    // copy dataref to temporary value
    float hdg = headingBug;

    // apply changes to temp value
    hdg += myEncDiff;

    // do range checking
    while (hdg < 0.0) hdg += 360.0;
    while (hdg >= 360.0) hdg -= 360.0;

    // write validated new heading back to dataref
    headingBug = hdg;
  }
}
2行目が繋ぐピンの位置です。
Encoder myEnc(7, 8);
このコードは既に、1メモリずつカウントするように設定されています。
Encoder myEnc(7, 8);
このコードは既に、1メモリずつカウントするように設定されています。
- 低価格コクピットの自作
- DataRefEditor
- プルアップとプルダウン
- Nav1の周波数の設定をロータリーエンコーダで行う
- スロットルコントロール
- イグニッションキーコントロール
- 針路バグコントロール
- 針路バグとエレベータトリムの切り替え
- 回転動作を粗いと微細で設定 & 3つのモードの切り替え
- ギアのアップダウンコントロール
- ロータリーエンコーダの色々な数値の設定
- トグルスイッチコントロール
- ロータリースイッチコントロール
- Teensy&キーボードボタン
- Teensy&ジョイスティックボタン
- プッシュスイッチでトグルを実現
- プッシュスイッチでLEDをONにしたままにする
- Teensy & I2C接続キャラクターLCDモジュール
- 7セグで数字を表示
- X-Plane LED ON/OFF
- マウスホイールの活用
- B 737-800
- B747-400
- B 777 Worldliner
- SiteMap
Contents